| | | |
Home > Online Help > Audio Editor > Using Filters on Audio
This tutorial explains how easily you may use filters on an audio file with just couple of clicks.
Do you need to modify and enhance audio file? DJ Audio Editor is the best solution for this task.
In this tutorial, we'll show you in detail how to use filters on audio file via our fast and simple Audio Editor. Only run the editor, choose your audio and select a ready-made filter - just follow the four simple steps below.
Step 1: Get Program4Pc's Audio Editor
Download Now
How to Use Filters on Audio File
This tutorial explains how easily you may use filters on an audio file with just couple of clicks.
Do you need to modify and enhance audio file? DJ Audio Editor is the best solution for this task.
In this tutorial, we'll show you in detail how to use filters on audio file via our fast and simple Audio Editor. Only run the editor, choose your audio and select a ready-made filter - just follow the four simple steps below.
Step 1: Get Program4Pc's Audio Editor
Download Now

Step 2: Open an Audio You Wish to Use Filter On
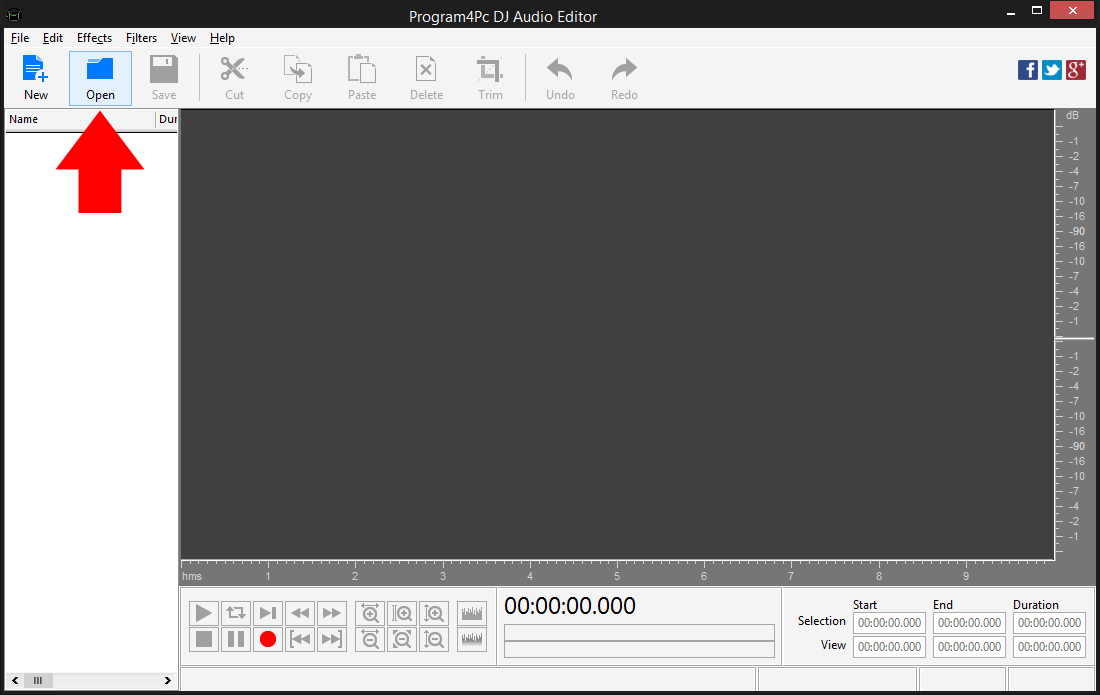
You can use a filter to the whole file or modify just a part of the track. To select an area where you want to use an audio filter click within the Waveform Display and without releasing the left mouse button, move the cursor to the left or right to make a selection.
Step 3: Choose an Audio Filter to Apply

Note: If you do not select any portion of audio, the effects will be applied on entire audio file.
Step 4: Adjust the Properties of Audio Filter
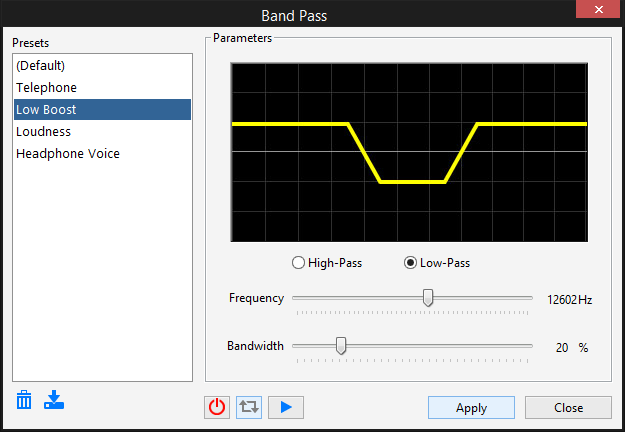
To quickly compare the processed audio with the original sound, turn on/off the filter preview and play again - you'll hear the sound without the filter.
Click Apply to save changes or Close to discard them.
Step 5: Save Your Edited Audio File
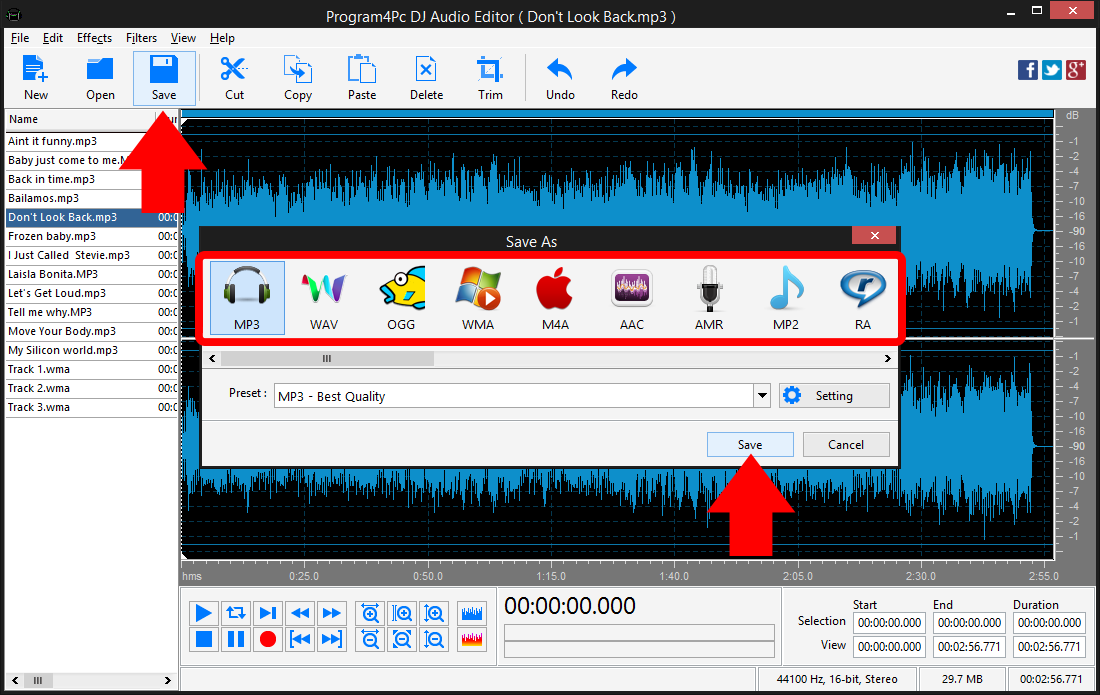
By default, edited audio files are saved to the specific folder but you may choose the new folder as well.
That's it!
That is the simplest way for using filter on audio file with our fast and easy Audio Editor! Now, whenever you want to use filter and modify audio, just run the program and repeat these steps.
Download Audio Editor
That is the simplest way for using filter on audio file with our fast and easy Audio Editor! Now, whenever you want to use filter and modify audio, just run the program and repeat these steps.
See what else Program4Pc Audio Editor can do for you:
- Edit audio file
- Trim audio file
- Merge audio files
- Edit audio CD tracks
- Apply effects on audio file
- Record audio
- Create ringtone for iPhone
- Edit audio tag